Showing posts with label vintage. Show all posts

Monday, 26 November 2018


Now that I’m commuting everyday I can’t stop reading. I do not read real books anymore, only ebooks. Because 1/ there is no more shelf space at home and 2/ have you tried to hold a book open with one hand during London peak hour? Your face will be mashed into someone’s shoulder first. This is a felt sweets bag from Japan, gift from a friend in #Penang. It’s so striking and cute. I have no idea what is “Hokkaido Milk Land”. After the sweets were consumed, I upcycled it into a kindle case by sewing a red polyester satin lining (leftover/remnant from when I made the 1950s swing cape, remember?) made to measure, inside it. Wa-lah! Fully-lined kindle case.
#fixingshit #dressmaking #frugalliving #imakemyownclothes #sewing #sewcialists #customized #customizacao #DIY #homemade #vintage #sundayvibes #weekendproject #upcycling #repurposed #amazonkindle #amazon #japan #hokkaidomilkland #londonunderground

Thursday, 22 November 2018

Fully-lined zipped makeup bag, spare tights or pencil case

Getting all professional now. This is the last project for today I swear. So this is a brush case or makeup case made from remnant. 


Also perfect size for spare tights.


For commuting you cannot have a deep makeup bag - it’s v irritating because everything falls to the bottom. Therefore you need a long shallow one to find things easily. Washable. Light. Took about two hours because the zip is a bugger and I had to rip it out twice due to inaccuracy and crudeness. My fault. This case also can be for carrying spare pair of tights, perfect size for it. For when you get a ladder or need a quick change or if there’s an event and you need smartening up. 

#fixingshit #dressmaking #imakemyownclothes #sewing #sewcialists #customized #customizacao #DIY #homemade #vintage #sundayvibes #weekendproject #fashtag #wiwt #whatsinmybag #makeup #makeupjunkie #wakeupandmakeup #blendthatshit #makeupartist

Sunday, 30 September 2018

How to Replace Broken Buckle on Leather Belt


Finished view of belt.
Next dastardly mini task. This is a vintage belt with fine leather marquetry in scallop shape navy and white c. Late 1960s or early 1970s anybody? 
As you can see it is missing a buckle because it has rusted or disintegrated away or whatever. Reason for fixing this belt is that it’s leather and handmade in the first place. If I start unpicking old plastic/vinyl, it will just crack. 

You are probably thinking to yourself, why don't I just throw it away. I can't just throw it away because we are already living in a throw away culture, and I was brought up to always fix or repair or mend something at least once. If it cannot be mended then you have to throw it away.

1/ The first step is to unpick the entire area concerned to open up the buckle holding capsule.

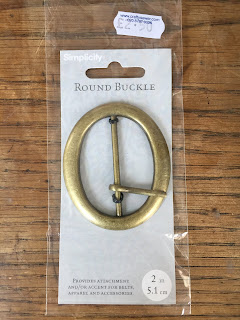
2/ Buy a belt buckle that fits with the width of the belt. Yes you might actually have to spend money. But it won't be the cost of a new leather belt. I promise you this.

3/ Sew it on using the original holes to make it easier and not to impale yourself.

4/ Glue and clamp to make the new joint flat.

5/ Wa-lah! All done. 


Thursday, 27 September 2018

1960s empire line Jackie Onassis Audrey Hepburn Wedding Dress

“It was 20 years ago today...” I wore my homemade wedding dress to London’s Westminster registry office. Hey yes thanks for asking, I did do my own makeup, of course! I was always mad about makeup. This 1960s Jackie Onassis Audrey Hepburn style dress took me 40 hours or so I wrote in my time sheet as I was so meticulous and thorough (THEN). The neckline was completely hand-embroidered with beads bought in #JohorBahru my home town with my mum. The fabric is ivory duchess satin and the polyester lining were from Singapore’s Chinatown. It is of course fully-lined, including the sleeves and to the full length of the hem, none of this cheating stuff. The most fun was handmaking the pretty bow which is perfectly shaped. I was size 12 then and I’m size 6 now, see photo of the back being clipped/clamped. How things have changed, right? #whatwouldguccido?#fixingshit #dressmaking #imakemyownclothes #sewing #sewcialists #customized #customizacao #DIY #homemade #vintage #sundayvibes#weekendproject #weddingdress #1960s #jackieonassis #fashtag #wiwt #whatimwearing

Friday, 21 September 2018

Vintage 1960s style FRANCOISE Dress with French Darts

After about 600 years I finally finished making this #Francoise #dress from #Ikea curtain fabric. So called because of the #French #darts. Oui. Not the championships but one continuous dart from hip to bust each side. 
#whatwouldguccido? #fixingshit #dressmaking #imakemyownclothes #sewing #sewcialists #customized #customizacao #DIY #homemade #vintage #sundayvibes #weekendproject #francoisedress #peterpancollar #fashtag


Friday, 27 April 2018

BACKPACK ORGANIZER INSERT with 15 Compartments Pockets DIY homemade project

Have you ever thought that it is so irritating when everything falls to the bottom of your backpack and it takes ages to find something because you have to rummage around due to everything being all mixed up and messed up? This organizer with 15 pockets or compartments is quite easy to make and requires no other template than the template of your backpack outline and the things you have to lug around!


This is the template, traced from the outline of the back of the backpack.


This is a sheet of buckram stiffener, to be cut a few mm smaller than the outline of the template.

View of organizer in use and in action.

I am a total backpack devotee. I am not a handbag kind of girl. It is so awkward with a heavy one-sided bag and the same thing always happens - everything inside is messed up and jumbled up. For evenings out to cinemas or restaurants, I have little crossbody bags and so I can be hands free on the tube or when travelling abroad. But for daily use, it has to be the backpack. Once you're a mum and you have to carry more than a lipstick and a mirror, you will understand what I am talking about. You may remember a previous post when I had to replace the zip on my my favourite backpack the mini Converse All Star leopard print backpack which is not even available to purchase now.


Thanks to my neighbour Krissy, I have all these scraps which are quite large and they are from curtain or upholstery offcuts so I did not want to waste them and they are a bit too rough and tough to use for dress making. The scrap I have chosen is just a simple checkered pattern canvas like cotton.

I should have made this organizer long ago, like since my student days when I first had a backpack. Why didn't I think of it then?


Thursday, 19 April 2018

IKEA Hack: Painting and customizing found cabinet

I have had to complete a few #DIY tasks so I had to restrict social media access to once or twice a day. Found another piece of discarded #furniture in someone’s rubbish. It was in pieces, many parts. Took it home, woodglued it and got #ladyboss to help paint. I marbled the top. Black gloss is a pretty amazing paint imho. It really smartens the entire look (frame, legs etc).
And. Wa-lah! #1950s #Parisian #glamour#makeover for this incredible piece of #IKEA furniture. BTW it is the Hemnes bedside cabinet if you are interested to do the same.
Feeling quite proud. Total cost £2. This is for the pink paint which unbelievably I did not have since it is my favourite colour.
The other paints I already had. When I repurpose old or found furniture, I don't have a design execution plan or a sample schedule. I think it's fun to make things up as you go along, and if you stick to only three colours, you won't go wrong - as long as the three go together well. I know what colours go well together because I have a good eye and I don't plan or premeditate the task beforehand. I tend to use whatever I have, otherwise it defeats the whole purpose of repurposing and thrifting.
I tend to go for high contrast colours. I prefer strong colours to grey on grey or beige on beige. Those would be a dull choice for me. 
This is the ladyboss helping to put the jigsaw together and woodgluing the joints.

After gluing, we painted the drawer gold.

View of finished cabinet

View of marbled top


Monday, 29 January 2018

My First Pair of Ballet Shoes

Every now and then I am so thankful that my mother was one of those mums who never threw anything away. Sometimes I am amazed with the things that she comes up with, like this pair of ballet shoes. It is all I have left of my ballethood as a child. I only did it for a term. After that we had to call it quits as my parents said it was too expensive, with the uniforms and the shows and so on. They said they were already paying for my piano lessons and I showed no aptitude at dance. I was really crushed and I still remember that day, that very last day when I did ballet. They are soft leather both inside and out and in a very pale pink. There was a pair of ribbons per shoe and we learned how to tie them properly.

Heartbroken, I hung on to the shoes which my mother also did, as a souvenir of that time. I remember weeping into them. 41 years passed. When you are born and raised in an ugly, post-industrial working-class mess of a city called Johor Bahru, (which is like saying you are from Hull) there is a certain hopelessness and ennui in realising any whim, fancy or artistic dreams or to enjoy a culture of sophistication. At least there was one school of ballet and a public library at the time, which gave me a glimpse of that other world, the one that I should be in.

However, today as an adult, fortunately I have the benefit of hindsight which is that I am super-proud, excited and happy to have grown up in a city of such vileness because I now realise I have escaped. Johor Bahru made me who I am, it is my identity and my self-worth.

"I made my living writing about the beauty of ugliness." - Jack Kerouac


How To Fix or Replace Broken Umbrella Handle DIY

I found a posh umbrella, discarded. I know it’s posh because it says Belgravia Gate, and also know it’s been discarded because it’s got no handle. But it’s actually very good quality, fully-lined and everything. Thick black spokes and fabric. 
So I took it home and I made my own handle, from DAS modellingclay. This usually costs about £3 from The Works or any art shop but I already have a lump in my fridge for doing repairs.

Even carved my initials at the end using a butter knife. I stuck a BBQ skewer to make holes in case you want to hang up and put a string through. 


The handle even has finger moulded grip like you see on golf umbrellas. I used both left hand and right hand to form the moulding so that you can use it with either hand.

And wa-lah! After about 24 hours and it has completely air-dried, I masking taped and took it outside to be spraypainted. I used matt black as that is all I have from doing gutter repairs and other black things.


 It looks like a charred sausage. 


Apres spray: I took it back inside and I had to air dry it on the end of the Dyson vacuum cleaner which has a perfect hole because can you believe it I do not have anywhere to stand it vertically to dry for another half a day!


Very proud of fixing this perfectly top quality umbrella. But now I have finished "handling" (get it) this project, how come it won't bloody rain. It was raining all last week!