Showing posts with label mending. Show all posts

Monday, 26 November 2018


Now that I’m commuting everyday I can’t stop reading. I do not read real books anymore, only ebooks. Because 1/ there is no more shelf space at home and 2/ have you tried to hold a book open with one hand during London peak hour? Your face will be mashed into someone’s shoulder first. This is a felt sweets bag from Japan, gift from a friend in #Penang. It’s so striking and cute. I have no idea what is “Hokkaido Milk Land”. After the sweets were consumed, I upcycled it into a kindle case by sewing a red polyester satin lining (leftover/remnant from when I made the 1950s swing cape, remember?) made to measure, inside it. Wa-lah! Fully-lined kindle case.
#fixingshit #dressmaking #frugalliving #imakemyownclothes #sewing #sewcialists #customized #customizacao #DIY #homemade #vintage #sundayvibes #weekendproject #upcycling #repurposed #amazonkindle #amazon #japan #hokkaidomilkland #londonunderground

Sunday, 30 September 2018

How to Replace Broken Buckle on Leather Belt


Finished view of belt.
Next dastardly mini task. This is a vintage belt with fine leather marquetry in scallop shape navy and white c. Late 1960s or early 1970s anybody? 
As you can see it is missing a buckle because it has rusted or disintegrated away or whatever. Reason for fixing this belt is that it’s leather and handmade in the first place. If I start unpicking old plastic/vinyl, it will just crack. 

You are probably thinking to yourself, why don't I just throw it away. I can't just throw it away because we are already living in a throw away culture, and I was brought up to always fix or repair or mend something at least once. If it cannot be mended then you have to throw it away.

1/ The first step is to unpick the entire area concerned to open up the buckle holding capsule.

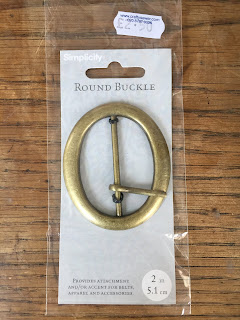
2/ Buy a belt buckle that fits with the width of the belt. Yes you might actually have to spend money. But it won't be the cost of a new leather belt. I promise you this.

3/ Sew it on using the original holes to make it easier and not to impale yourself.

4/ Glue and clamp to make the new joint flat.

5/ Wa-lah! All done. 


Friday, 27 April 2018

BACKPACK ORGANIZER INSERT with 15 Compartments Pockets DIY homemade project

Have you ever thought that it is so irritating when everything falls to the bottom of your backpack and it takes ages to find something because you have to rummage around due to everything being all mixed up and messed up? This organizer with 15 pockets or compartments is quite easy to make and requires no other template than the template of your backpack outline and the things you have to lug around!


This is the template, traced from the outline of the back of the backpack.


This is a sheet of buckram stiffener, to be cut a few mm smaller than the outline of the template.

View of organizer in use and in action.

I am a total backpack devotee. I am not a handbag kind of girl. It is so awkward with a heavy one-sided bag and the same thing always happens - everything inside is messed up and jumbled up. For evenings out to cinemas or restaurants, I have little crossbody bags and so I can be hands free on the tube or when travelling abroad. But for daily use, it has to be the backpack. Once you're a mum and you have to carry more than a lipstick and a mirror, you will understand what I am talking about. You may remember a previous post when I had to replace the zip on my my favourite backpack the mini Converse All Star leopard print backpack which is not even available to purchase now.


Thanks to my neighbour Krissy, I have all these scraps which are quite large and they are from curtain or upholstery offcuts so I did not want to waste them and they are a bit too rough and tough to use for dress making. The scrap I have chosen is just a simple checkered pattern canvas like cotton.

I should have made this organizer long ago, like since my student days when I first had a backpack. Why didn't I think of it then?


Monday, 29 January 2018

How To Fix or Replace Broken Umbrella Handle DIY

I found a posh umbrella, discarded. I know it’s posh because it says Belgravia Gate, and also know it’s been discarded because it’s got no handle. But it’s actually very good quality, fully-lined and everything. Thick black spokes and fabric. 
So I took it home and I made my own handle, from DAS modellingclay. This usually costs about £3 from The Works or any art shop but I already have a lump in my fridge for doing repairs.

Even carved my initials at the end using a butter knife. I stuck a BBQ skewer to make holes in case you want to hang up and put a string through. 


The handle even has finger moulded grip like you see on golf umbrellas. I used both left hand and right hand to form the moulding so that you can use it with either hand.

And wa-lah! After about 24 hours and it has completely air-dried, I masking taped and took it outside to be spraypainted. I used matt black as that is all I have from doing gutter repairs and other black things.


 It looks like a charred sausage. 


Apres spray: I took it back inside and I had to air dry it on the end of the Dyson vacuum cleaner which has a perfect hole because can you believe it I do not have anywhere to stand it vertically to dry for another half a day!


Very proud of fixing this perfectly top quality umbrella. But now I have finished "handling" (get it) this project, how come it won't bloody rain. It was raining all last week!

1950 Lined Military Cape Jacket Original Vintage Pattern Mandarin Collar


    • I was inspired by the city of Hong Kong which was both vintage and high tech at the same time. This is a military cape style jacket with mandarin collar was started after I returned from there launching my first book, Cry of the Flying Rhino. I enjoyed the visuals of an eclectic world made famous by the 2000 Wong Kar Wai movie In the Mood for Love set in 1962. The mandarin collar of this cape is supposedly a nod to that movie however it is 1950s or a softer and semi-structured version of the traditional high and hard collar of the 1960s. This is a still from the movie, showing the mandarin collar.
      High semi-structured collar
    • Hong Kong was an eye-opening experience for me. I had never before had the opportunity to visit somewhere not just for a holiday or vacation, but in order to pick up my literary prize and to launch my book. As it was such an auspicious occasion, I took the lead and decided to make from scratch a formal short cape in a military or auspicious colour. 
      Exhibition of vintage cheongsams - this is from the 1930s
        Bustling and exciting all the time, new and old world collide

        Bamboo scaffolding on modern skyscrapers- again new and old

        Old Hong Kong - colourful vibe of a vintage coffee shop, strong colours, red is always present
        Exhibition of different mandarin collars on vintage cheongsams

      • I used a pattern I bought on eBay last autumn/fall something like 3.50£ - I forgot already. The pattern is an original 1950s vintage pattern and it only comes in small medium or large. I went for small.
      • The fabric is a heavyweight military red wool and it is also from eBay and it cost only 6.50 for 1.6m. I never use the metreage requirement on the packet because it is quite wasteful and you end up with a lot of leftovers. So I usually recalculate fabric requirements. The lining cost about 3.50. There were only three "reds" to choose from in the linings section. I went to a sewing and fabric shop in Tooting, so not exactly very much choice. One was too brown. One was too orange and one was pink. Naturally I had to go for 1.6m of the orangey one as you can see. The horsehair interfacing was from eBay and it was pricey at 6.50 so I got only a metre as that is the minimum you have to get.
      • Once I returned from Hong Kong I proceeded to cut out the pattern and in typical frugal style I have cut out with the pattern very close together.
      • When you make a fully-lined jacket, I forgot you have to make the same thing 4 times. The jacket outer, the lining, the facing and the interfacing. That is why it takes so long and 80% of that no one will ever see even. Except maybe your drycleaners.


      Keeping pieces close together


      Assembling facing, horsehair interfacing
      Preparing to make bound buttonhole


      The cuff is based on this double fold turn up as per Maggie Cheung's coat in the film:
      Double turn up 50s/60s cuff


      View of bound buttonhole
      Close up of fabric covered button
      View of lining

      View of back - finished


      Saturday, 15 July 2017

      How to replace broken zip on Converse All Star backpack


      This Converse all star leopard print backpack is a treasure. It has been to a few countries with me and it is the perfect size. I actually had to fix the zip because I cannot find another backpack which is so perfect for me. If it is too big for a daypack, things will just get lost in it. It is just nice for an umbrella, a book, a cardigan, a small makeup kit, and the usual, wallet, keys etc. It is ideal for night or day. I use it for ballet. I use it for trips with the children or to the city or to the park. Needless to say, the leopard print makes it hard to lose or to steal. You will always notice it. No stealer will want to walk around with it unless they want to look like a cartoon character saying "look at me! I stole this!". Wherever it is in the house, you will find it. Sadly, the zip went and it was through frequent use, i.e. wear and tear.

      Photo of the broken original zip and me taking a seam ripper to it.
      TIP#1: Never take apart something unless you have examined it closely and taken photos to show how it was put together. No one can help you put together something in reverse order, you have to know this yourself as everything could possibly be put together differently even though it is a standard item like a zip. TIP#2: So for this task I measured the original zip required BEFORE taking it apart. Do not waste time unless you are sure you can get one. I had to buy it on Ebay. It was a 22" or 55 cm zip and because the old zip is a fashion lightweight kind I was not happy that it was not longlasting. I bought an industrial heavyweight big teeth red zip this time so that it can withstand wear and tear. It was very cheap, I think only £2.15 on Ebay.

      Slice away one stitch at a time without touching original fabric or bias binding.
      View of the defunct zip and original zip pull. See how small the teeth are? This is a lightweight zip.
      Using a seam ripper, rip out a few seams at a point near the start. Once opened up, use the razor to slice away more of the stitching as shown. This is quite an agonizing task because you will have to grip with left hand if you are right handed, and with the right hand cut away the stitching very carefully (i.e. one stitch at a time) without cutting the original fabric or anything else - just the stitching. You cannot do this quickly - believe me I tried and I am real fast at ripping. You just can't because the fabric is waterproof and tough. This stage took 45 minutes.

      Once you have done one side of the zip, do the other. A zip has two sides after all! Obvs.

      Now using your record photos as a guide, remember how to sandwich the zip in place within the fabric and the seam bias binding. Hand pin the entire length of the new zip followed by hand tacking it in place.

      Once you have done one side, unzip the zip and do the other side.

      Once tacked by hand, zip up the whole zip and shut the backpack. You can see the black hand tacking in this pic.

      Check balance. Lay flat. Make sure there is no pulling, wrinkling or puckering of the fabric, it should be totally smooth and like the original!

      Now use the machine to stitch over the hand tacking. Use the record photos again to check - and it so happens I have yellow ochre thread to overstitch the outer or the right side of the fabric, with the under bobbin thread in black.

      On the other side of the zip, it is black on the bottom and top side of the fabric. Use the machine to stitch this.


      Finished!

      No original pull but I will get a small piece of red or black webbing to sew a generic pull.

      Checking to ensure that is it all neat, no gaps, puckering or pinching of the fabric. Fabric against zip must be perfectly smooth as the original.
      Whole job took 2 hours and 45 minutes including the seamripping and broken zip removal. So proud of the Converse leopard print backpack. Now it will and should last another ten years.

      Frugality is so tedious. It takes time because all things take time which are worth the time. Why not take a look at the book I wrote? It is a literary thriller and features themes of excess in the 1980s.